Good day Python and GIS enthusiasts. This weeks work is dedicated to taking stand alone scripts and making them into Script Tools usable within ArcMap. The overall objectives were to learn about and exercise these script to tool skills. There are many reasons that you may want to utilize a Script Tool which takes a script and modifies it for use within the geoprocessing environment over a stand alone script which is usually ran in a Python user interface. One of the biggest advantages is the use of specific parameters. A Script Tool allows you to more easily select the inputs and outputs you desire over having to change copious amounts of variables and hard coded file paths. There is less need to build in error checking as parameters assigned to a script tool are all of a certain type. The tool wont let you use parameters that don't match the needed type, whereas you could be stuck digging through a long error message in the stand alone. Tools are integrated with the environment you already have built for whatever processes you're working with in ArcMap. Tools can be packages and shared more readily than some standalone scripts, especially if the person you're sending the script to has little to no knowledge of Python. So with all of that said, lets look at a quick rundown of transforming a stand alone script to a Script Tool, and show some examples.
First to build the tool you should be starting with a particular script executing whatever flavor of geoprocessing as you need. Then you need to start the transformation process. One of the biggest steps in this is changing hard coded file paths and entered parameters such as specific inputs and outputs to ArcMap and arcpy usable code. This takes the form of the GetParameter or GetParameter as text functions in arcpy. So as mentioned above we take the long string file path and replace with Variable = arcpy.GetParameter(index#), remembering that the parameter in the script needs to match the one you set up in your script tool. Now we need a place to house our script tool. This requires a custom tool box, new or previously established doesn't matter. But it cant be one of the default ArcMap toolboxes. Add a script to the tool box, Name it, label it, and slap a location to the script you're building the tool from on it. If you're ready you can enter your specified parameters now, or finish the script tool creation without them and edit them later. A Script Tool without parameters assigned will still run like a standalone script. But, parameters are better, so lets input them corresponding to what we modified in our script, keeping a good index, and making sure our parameter types are good to go. Once this is accomplished your Script Tool is born.


First to build the tool you should be starting with a particular script executing whatever flavor of geoprocessing as you need. Then you need to start the transformation process. One of the biggest steps in this is changing hard coded file paths and entered parameters such as specific inputs and outputs to ArcMap and arcpy usable code. This takes the form of the GetParameter or GetParameter as text functions in arcpy. So as mentioned above we take the long string file path and replace with Variable = arcpy.GetParameter(index#), remembering that the parameter in the script needs to match the one you set up in your script tool. Now we need a place to house our script tool. This requires a custom tool box, new or previously established doesn't matter. But it cant be one of the default ArcMap toolboxes. Add a script to the tool box, Name it, label it, and slap a location to the script you're building the tool from on it. If you're ready you can enter your specified parameters now, or finish the script tool creation without them and edit them later. A Script Tool without parameters assigned will still run like a standalone script. But, parameters are better, so lets input them corresponding to what we modified in our script, keeping a good index, and making sure our parameter types are good to go. Once this is accomplished your Script Tool is born.
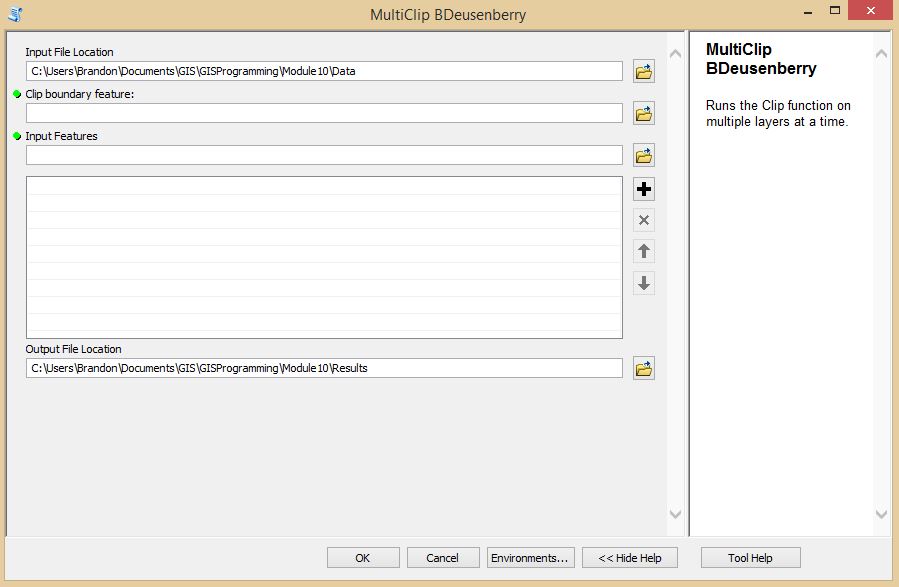
Above is a look at the Script Tool created for the assignment. If you're thinking it looks just like every other tool you've seen then congratulations to me, thats the point. As mentioned above though, you have basically free reign of the parameters you want to choose. This tool clips multiple features to a specified feature at once. So you can see where you have control of the parameters.
After having built the Script Tool above we can run it like any other. However one of the cool features of a script tool over a stand alone is the ability to include messages within the geoprocessing environment, in this case the pop up tool progress box, and results window. With the standalone we typically only have the Pythin Interactive window available to us.

Here is a good look at the results from having run the tool. You can see the messages mentioned above which have been generated in the progress window, and you can see the resulting shapefiles in the ArcCatalog look on the right, as well as the toolbox and script tool that were in use.
All in all it is hugely beneficial being able to transform a script to a script tool for use in ArcMap. And the last thing ill touch on is that this whole thing is shareable. Take the toolbox.tbx seen there in the image, and the script that generated it, zip them together using your favorite zip service, I like 7 Zip, and share away. Thank you for your time.
No comments:
Post a Comment